 We love our hamster (Pel) and try to give her a good life. She seems quite happy, and lets us pet her. She allowes the kids to play with her, pick her up and move her about without any problems. We have her solve mazes, we give her special food puzzles, and we give her fun items to play with in her habitat. She has a small house, a half coconut, a running wheel, a sand bath, a small china cup with her food, a small plate for her vegetables, a water tube, a small ladder and a couple of hollow tree trunks.
The tree trunks were added because I thought it would be fun for her to explore them, add a new hiding spot, and they can be used for biting and improve her dental health. She liked them, and I went a bit overboard. Each time I added a small tree trunk Pel would come out and explore. She would smell it, run across it, run through it, and sometimes give it a little nibble. She seemed so happy that I kept adding trunks. They started creating a complex maze where she could run through. It seemed so fun.
But there was a small problem that I did not realise until it was to late. Pel played with all the tree trunks, but slowly the top of het habitat was coming into reach. One day she must have taken a leap of fortune, and she was suddenly gone. Her habitat was empty. At first we did not notice, and thought Pel was relaxing at one of her hiding spots. Alan told me once he had not seen Pel in some time, but I assured him she was simply hiding. After a quiet night it hit me, and I knew she was gone. Every night she would exercise and run like crazy in her wheel. Quite a noticable racket, but now the night was silent. A terrible feeling came over me, and after a thorough search of her habitat it was clear she was not there.
Luckily we kids were not at home. Alex was on a trip with his godfather, and Alan was staying with friends. I searched everywhere. Moved the couch, the cupboards, the beds. Everything I could think of. I investigated all the lower parts of the cupboards. Nothing. My instincts told me that Pel could have no desire to go anywhere, but my mind told me I looked everywhere. Then Ana started telling me it was kind of my fault. The effect it would have on Alan, and lots of talk about me loosing his favorite pet. There was also lots of talk about a dead Pel that we would find some day, because of the smell. I broke.
That afternoon we decided to replace Pel. We went and got another hamster. Similar, but clearly not the same. I was so sad, but we wanted to do the best we could to avoid the sad truth. Pel2 was placed in Pels old habitat, and we hoped Alan would not notice. That night Alan slept with some friends, so the new Pel2 had some time to adapt to the new surroundings, and hopefully it would not be to obvious that there quite a lot of small changes.
Our beloved Pel was still missing, and I decided to sleep in the living room, hoping for some sign or sound when she became active at night. All over our home, at strategic points, I had placed little stacks of sunflower seeds (her favorite food) so I could hopefully verify she was still around. I went across the appartment a few time in the dark, with a flashlight, hoping to see movement, but nothing. Ana was asleep, when I also started to get ready for bed. One last round of the appartment and I would call it a night. Once again I checked all the bedrooms, the bathrooms, the living room underneath all the furniture and finally the kitchen.
I could not believe my eyes. It felt magical. So strange. Pel was there, literarily sitting in the middle of the kitchen floor, looking right at me. She did not move at all, she just looked at me. I gently picked her up, and it felt like Pel had returned home. A massive weight lifted from my shoulders. I gave Pel a kiss, and woke up Ana. We quickly moved Pel2 to a different habitat and retuned Pel back to her home.
During the night I woke up a few times, but hearing Pel running in her wheel gave me a warm happy feeling that made me fall right back to sleep.

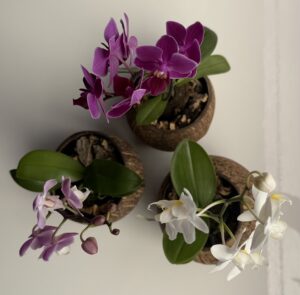 I am getting better and better at creating beautiful coconuts with orchids.
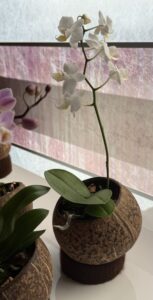 Now assemble everything. First place some bark in the coconut, then place the orchid inside, and fill the sides with pieces of bark so the plant stand firmly. Then place the coconut on the base and turn it so the flower stand nicely upright.
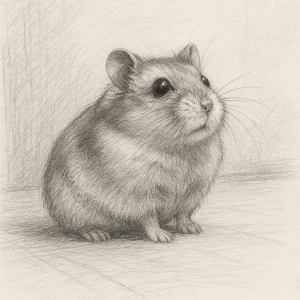
 With a little help from the AI we made Pel even prettier.
 I was so happy with my coffee plant, but unfortunately, my happiness was short-lived. A
 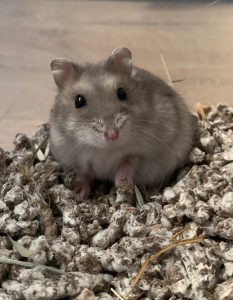 The whole family is happy with our new
 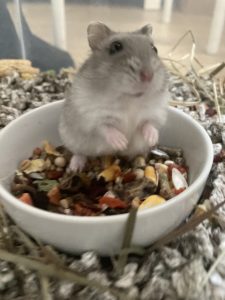 Her enclosure is about three times larger than the one she had in the pet store, where she lived with seven siblings. We built the entire setup ourselves, except for the running wheel. It consists of a large plastic bin, a food dish, and a water supply. There are a few tree trunks where she can hide, a wooden house with a slanted roof, and half a coconut with a convenient entrance. The floor is covered with a generous layer of paper for digging, along with a container of dried grass. She also has quite a few toilet paper roll puzzles, where we occasionally hide some food.
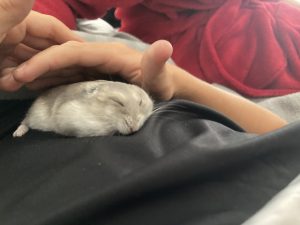 Not only is Pel an incredibly sweet housemate, but she is also very photogenic. So, we held a little photo session at home.
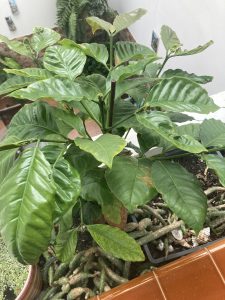 I got another chance! My
 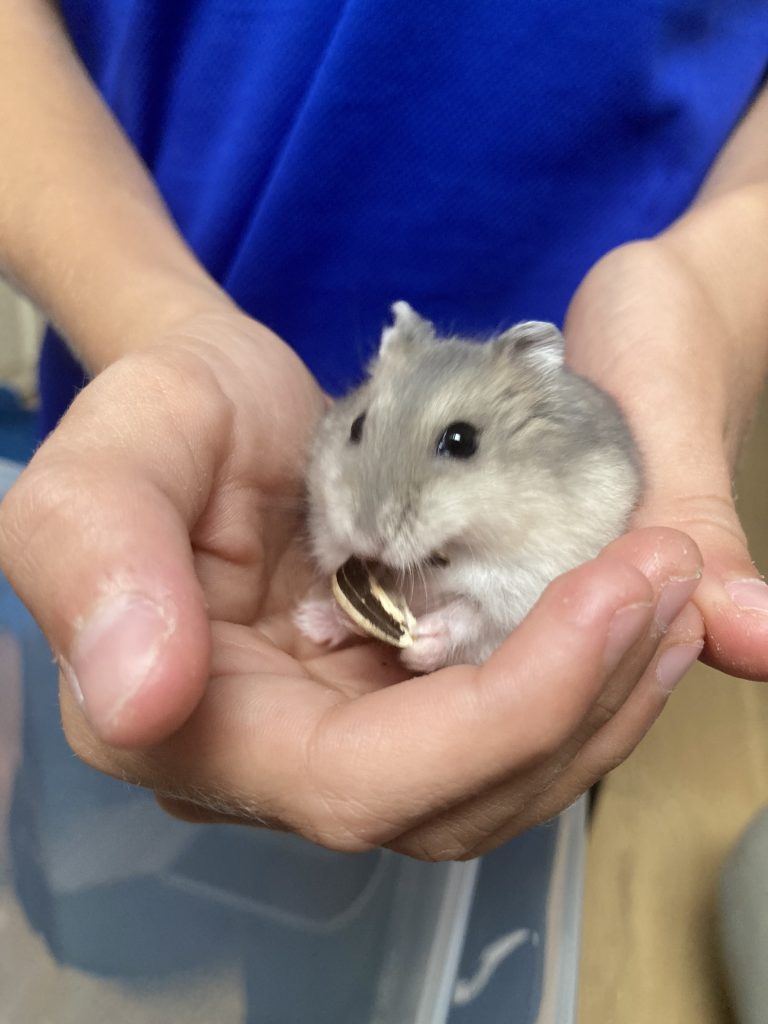 We have a new housemate! A hamster named ‘Pelucita.’ It’s a Russian hamster, but fortunately not imported. Our hamster was born on Spanish soil. We built her cage ourselves—a nice spacious cage with plenty of toys, a hamster house, a running wheel, and her food and water. I think our hamster is very content; during the day she’s calm and plays cheerfully with the kids, and in the evening she goes completely wild and seems to be running a 10 kilometer marathon in her wheel.
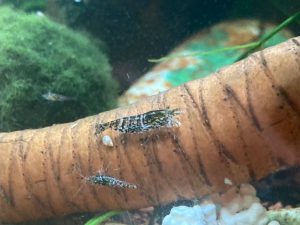 We
We 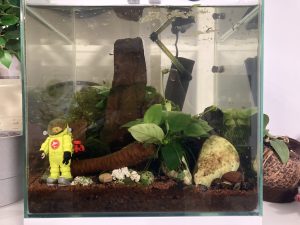 At this point, we only have two types of shrimp left: one that is semi-transparent and another that is quite dark, almost black, with a lighter stripe running along its back. It looks pretty nice, and most importantly, it seems like they are happy in their aquarium.
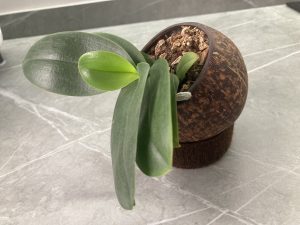 One of the coconuts that I used as a pot for a miniature orchid had a leak! Every time I gave the orchid some water a part of the water would slowly drip out, leaving some stains on the cupboard. I decided to make a new pot, using a new coconut, but this time I did something different. I sanded the coconut to make it nice and smooth, and after sanding it I oiled it inside and out to give it a nice darker color, and to make it even more water proof. The effect was really nice, so I will pobably repeat the same sanding and oiling with the second coco mini orchid we have.