New project: e-paper photo frame
Why: Standard digital photo frames use a small screen, just like a monitor. It looks nice, updates in a blink, and the pictures displayed are very visible. What annoys me is that at night the screen emits lots of light, and it is just too present. It does not look good, and it annoys me enough to turn the device off, and avoid turning it back on again.
The solution: A photo frame with an e-paper display does not emit light. In the dark you cannot see it, but this is exactly the same as with a normal photo you put on the wall.
Requirements: I want a simple frame. Just a couple of photos, each day a different one.
- No cloud,
- no AI,
- no integrated voice assistant,
- no monthly subscription,
- no required registration,
- no online accounts,
- no personalised advertisements,
- no harvesting of my data,
- no sharing my data with others.
I want nothing fancy, just an SD card I put my photos on, and a source of power to plug it in.
Proof of concept. Connect the raspberry to the epaper screen, and see if I can print one of my photos to it. It should work, but you never know.
Steps required for this phase:
- Get a raspberry pi. I wanted the smallest, most basic version, the Raspberry Pi zero 2 WH, but this version was sold out at various places, so I got the Raspberry Pi 3 Model A+ instead. This version is a bit bigger but for the proof of concept that doesn’t matter
- Get a micro sd card (big enough to contain the lite OS, and have some room for the images I want to display)
- Make it bootable with the raspberry OS
- First step is connect it to a monitor and a keyboard, and see if the Raspberry starts, and if I can connect to it
- Get the epaper screen
- Connect the epaper screen to the raspberry
- Install drivers
- Sent a test image to the screen
- Turn off the raspberry, and check if the image remains on the screen
If it works it works, and we can go and make it work even better.

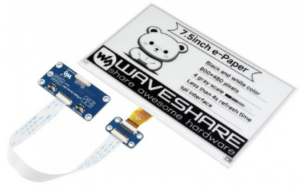 The first part of the puzzle arrived. I received the screen: a Waveshare 800×480, 7.5-inch E-Ink display HAT for Raspberry Pi.