
 I am getting better and better at creating beautiful coconuts with orchids.
First step, prepare the coconut: Saw off the top, sand the edges, and lightly sand the whole shell. At the end, I rub a bit of oil onto the outside of the nut to give it a slightly darker, shiny finish.
Then I make the base. I cut a piece from a plastic bottle and wrap it with brown wool until the plastic is no longer visible.
Next step, look for a good piece of tree bark. Usually I simply visit a forest with a few trees that have thick, cork-like bark and collected a few pieces that are usually scattered around on the ground. At home, I brake the bark into small pieces with pliers.
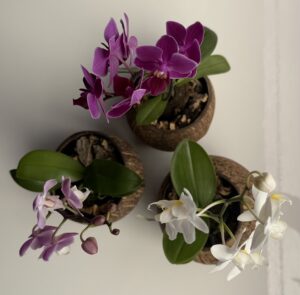
Finally the orchid. A local shop was selling cheap mini orchids for Mother’s Day. They were a bit smaller than the normal small orchids, but I suspected they would look really good in a coconut, so I bought three for only 8 euros each. I took the plant out of the pot and gently loosened the roots. They were usually pressed into a pot shaped coconut fibre mass; I loosened this a bit so the roots could grow more freely. I also removed the sticks that kept the flower upright.
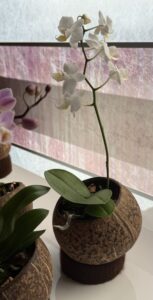 Now assemble everything. First place some bark in the coconut, then place the orchid inside, and fill the sides with pieces of bark so the plant stand firmly. Then place the coconut on the base and turn it so the flower stand nicely upright.
I added a little moisture, and found a spot with plenty of light but no direct sunlight. That was it, quite a bit of work but totally worth it because I get a great feeling of contentment, and a job well done, whenever I see the orchid.